Your cart is currently empty!
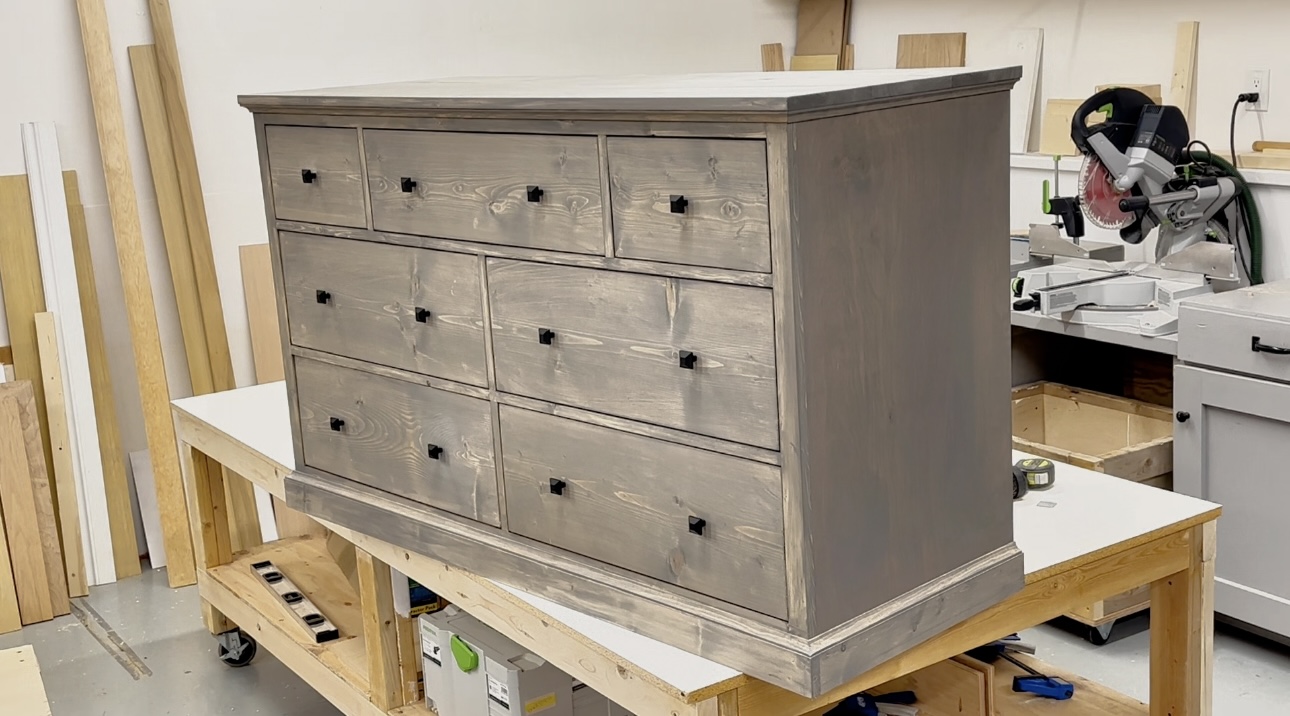
Why I Love This Dresser!
It’s not secret that I love dressers! They aren’t the easiest to build, but it’s so much less finishing work than having to paint or stain a bookshelf – and you don’t have to buy bins and baskets for a bookshelf! I like to think of a dresser as a “pay now instead of pay later” project – it IS more work upfront, and more money in drawer slides, but once done, you have a complete storage solution.
This dresser is one of my most favorite dresser builds to date! It’s a very classic style, with just a little cove moulding to create detail – it’s the solid wood that took the stain so beautifully that steals the show here!

You just can’t get that depth of finish with particle board and veneers. It is truly stunning!
The drawers also slide perfectly with metal slide that I fine tuned for easy operation. I am so excited to see this dresser in our home!
How I Built This Dresser
Here’s the steps I did to build this dresser. First, I cut the two plywood side panels. The plywood is very important to give the dresser dimensional stability over time, and keeps the project square.

I added 1×2 blocking to the inside, so the drawer slides will float on the inside. NOTE: In the plans, I changed up the process for building as I felt there was a better method to go about building the carcass.

This is the front trim piece, to hide the raw plywood edge.

Once the two side panels were done, all I had to do was attach them together with horizontal “rails” that trim between drawer faces. I also added vertical “stiles”, smaller trim pieces, to go vertically between drawer faces and support drawer slides.

I forgot earlier to drill pocket holes on the side frames for attaching the top in later steps, so doing that now.

The top I build out of 1×8 boards, using my vertical method for a nice smooth top.

Then I attach the base to the top with the pocket hole screws in the plywood panel, and also through the framing. I did have to drill half way through the 2×2 to get the 1-1/4″ pocket hole screws to bite.

Now on to drawer boxes! For a high use drawer, like a kitchen drawer, I would recommend building drawer boxes out with pocket holes – but for a clothing dresser? Brad nails and glue ALL DAY LONG.

The plywood bottoms I cut from underlayment (cheap and square!) and then glued on. The plywood bottom is very important to squaring up the drawer. A drawer built as a parallelogram isn’t going to slide right.
NOTE: This is shown in the video, I flip the drawer box over before attaching the plywood, so the flattest side of the drawer box goes to the bottom of the drawer, where the slides get attached.

These drawer slides are my favorite! The drawer members install flush to the front, wheels to the back.

For the cabinet members, I first install the front of the drawer slide, at a set height up on both sides. Then I use a level to set the back screw – make sure the table is level.

Now the drawer faces! I use shims to set them in place, attach with nails from the front and screws from the back.

I filled all nail holes with wood filler and let dry. Then I sanded with a sanding sponge. I sanded the drawer faces, rounding them back at the edges, so they looked perfect in the openings.

For the finish I used a water based semi-transparent stain, applying with a foam brush about 50% coverage (just to get the stain on the wood) and then wiping in with shop towels. So pretty!

Then the knobs, I used my Kreg tools to install all the drawer knobs.

These I bought off D.Lawless – link is in the shopping list.
After all these years, still cannot believe what you can make with lumber!
Video Tutorial – How I Built this Dresser
Here’s a quick time-lapse of this dresser build!
Free Plans to Build Your Own Dresser
The plans differ in the build process (but not the actual outcome) as I thought it would be easier to build in a different order. This project is NOT easy or quick – it was actually a long build, but worth it! – but please don’t try this as a beginner.
Leave a Reply